Packing for camping trips can cause a world of frustration and many hikers are prone to waste hours either racked by indecision…
Lightweight or winter sleeping bag?
Stove or no stove?
Gas or paraffin?
…or dealing with a gnawing feeling that they’ve forgotten one all-important item.
Below, I hope to simplify the whole process of packing and prepping by introducing you to a series of camping checklists adapted for use on a variety of trip types.
Table of Contents
Choosing Where to Go
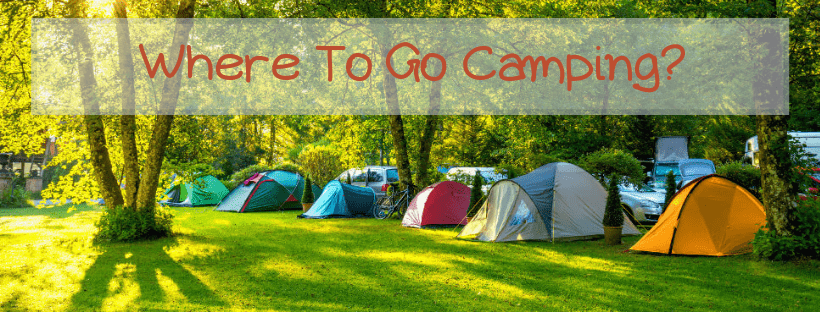
Where you head on your camping trips will ultimately come down to personal preferences as regards what you want to see, what experience you want to have, and just how wild you want things to be.
Your choice of location, in turn, will have a significant bearing on the gear you need to carry with you.
Broadly speaking, the three main types of camping we can do are in paid campgrounds, national and regional park campgrounds, and wild camping.
Below, I’ve added a short guide to each type.
1. Paid Campgrounds
Paid campgrounds are usually the ideal option for newcomers to camping who want to learn the ropes and gain some experience before heading out into the wild.
In terms of gear requirements, camping in paid campgrounds simplifies matters greatly by making forgetting any item less consequential.
Most sites will have facilities and amenities like toilets, showers, fire pits, barbeque areas, seating areas, and maybe even a store where you can stock up on supplies.
- Usually have showers, grills, and other amenities
- No need to carry food and gear long distances
- Clean drinking water readily available
2. State and National Park Campgrounds
These can vary greatly by location, but for the most part offer a convenient middle ground between wild camping and camping in paid campsites.
Typically, these campgrounds do not boast facilities and amenities but offer established pitches that are usually within a short distance of wild water sources.
Some other features you might find at the state and national park campgrounds include fire pits, grills, bear boxes, and rudimentary toilet facilities.
- Usually less isolated than wild camping locations
- Usually less crowded than established/paid campgrounds
- May have some rudimentary facilities
3. Wild Camping
Purists will tell you that wild camping is the only way to go, and there’s an element of truth in the claim.
Wild camping entails pitching your tent far from civilization in remote, wild locations bereft of any amenities or facilities and, as such, offers a true wilderness experience.
While this style of camping is undoubtedly highly rewarding, it does mean being a little more careful as regards the gear you carry with you on your trip.
Owing to the need for complete self-sufficiency, wild campers will need to carry all of their food, wash and hygiene supplies, cooking equipment, fuel, clothing, and other gear, often over long distances.
- Offers true wilderness experience
- Need to be entirely self-sufficient
- Need to carry more gear
When to Go

Needless to say, the differences in the gear requirements for camping in different seasons are fairly vast.
1. In summer
While in summer we might get away with a lightweight bivvy tent (or even sleep al fresco, tent-free), a light sleeping bag, and require only a few weather-based add ons such as a sunhat, sun cream, and midge/bug spray.
2. In winter and shoulder seasons
In winter months or shoulder seasons we might need to carry:
a tent of the four-season,
“bombproof” variety,
a heavy, four-season sleeping bag,
extra gas to melt snow for water,
snowshoes,
and even safety equipment such as crampons, an ice-axe, a snow shovel, snow probe, and avalanche beacon.
This added weight and bulk might put some off winter camping from the get-go. Personally, though, I find winter to be the most enjoyable time of year to head into the backcountry because:
- Trails and campsites are less crowded
- There are no bugs
- The aesthetics of snow-clad landscapes make the logistical difficulties and tolerating the cold temps worthwhile
- You earn serious kudos from your colleagues on Monday morning when you return from a weekend camping in the snow(!)
In short, it’s well worth putting in the little bit of extra effort required to make it happen.
That said, owing to the higher risk involved in camping in snow and cold conditions, I’d highly recommend getting a few summer and shoulder season outings under your belt before venturing out in winter!
Note:
In an effort to reduce pack weight, many campers:
—particularly thru-hikers and long-distance backpackers—
are apt to be a touch too optimistic in their pre-trip planning and so pack anticipating a best-case scenario as opposed to the worst-case scenario.
While weight savings are always welcomed where possible, don’t skimp on the necessities.
Far more disasters have occurred on account of underestimating the vagaries of the weather and conditions.
Packing too light than overestimating them, biting the bullet, and carrying a slightly heavier load than you might ultimately need.
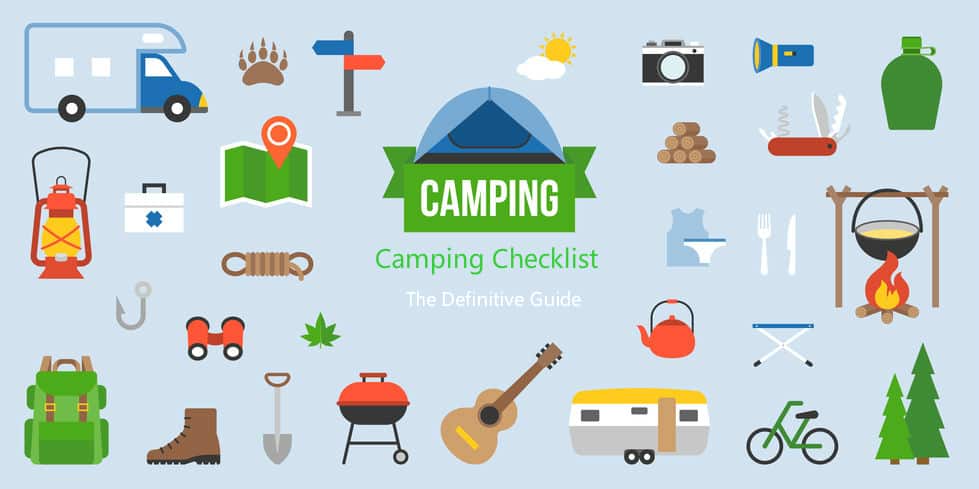
Camping Checklist
The “Must-Have” Camping Checklist
The following represents a baseline itemization of the fundamental camping kit required for any trip, irrespective of seasonal or temperature variations.
These are items I consider non-negotiable and carry with me on every trip.
The subsequent lists (summer camping, winter camping, weekend camping, and multi-day camping) include additional items and variations required for camping in different seasons or trips of longer durations.
Sleeping
Kitchen
Note:
- If I’m traveling ultralight over shorter periods I may skip carrying my cooking kit to save weight and make do with a sandwich and some nuts for dinners.
- Food (whatever time of year I’m camping, I opt for calorie-dense, lightweight fare like peanut butter, trail mix, nuts, rice, and dehydrated meals if I fancy treating myself)
- Water bottle/bladder (I carry both: a 1.5-liter bladder for hydrating on the move and a 2-liter Nalgene bottle for camp)
Health and Hygiene
Toiletries:
Note:
- Soap (I carry a multi-purpose, biodegradable soap that can be used for dirty plates, clothing, and washing)
- Trowel (to dig a cathole toilet)
First aid kit:
Many campers balk at the idea of carrying a well-stocked first aid kit but this small, 200-gram inclusion in your kit can be a lifesaver or,
At least, spare you a lot of pain and hassle should anything go wrong.
Note:
Tweezers (for tick removal and delicate first-aid work)
Miscellaneous Items
Note:
- Water purification system (tablets work best if you can stomach the taste!)
- Clothing (dependent on the season)
Summer Camping Checklist
The following are variations and additions I make to my camping kit when heading to the hills in warmer conditions:
Sleeping
Health and Hygiene
Summer Clothing
Even in more clement conditions, hikers and campers should always be prepared for the weather to take a turn for the worse.
This means packing—if not necessarily wearing—all the components of a three-part layering system and cold-weather accessories:
Note:
- Baselayer (technical synthetic or merino)
- Lightweight mid-layer (fleece or down)
- A heavier mid-layer to wear around camp at night (depending on temps)
- Camp shoes/sandals (optional)
Winter Camping Checklist
The following list includes the additional items you’ll need to add to the baseline, must-have list featured above.
You can stay safe and comfortable when camping in winter months by an upgrade in gear, most notably your tent, sleeping bag, and sleeping pad.
Sleeping
Note:
- 4-season tent (a summer or even 3-season tent won’t cut it if things get gnarly)
- Tent stakes (pegs are unlikely to stick in the snow)
- 4-season sleeping bag (aim for one with a comfort rating at least 10 degrees below the coldest temps you expect to encounter)
- Sleeping pad with a higher R-Value (4 to 6)
- Tarp (to supplement your groundsheet and provide additional floor insulation)
- Tent bootees (frostbite is no joke and tent floors can be particularly chilly even in the shoulder seasons!)
Kitchen
Health and Hygiene
Note:
Pee bottle (seriously! It saves you having to stumble out of your tent and take care of ‘business’ in the cold and dark. I highly recommend opting for a bottle with a reliable lid…!)
Winter Clothing
Weekend Camping Checklist
Weekend camping usually entails simply supplementing your baseline gear with extras of any expendable/perishable items.
In addition to the items contained on our must-have list, for weekend trips you should also consider carrying:
Multi-Day Camping Checklist
Multi-day camping trips can be incredibly enjoyable and rewarding experiences for nature and wilderness enthusiasts.
But planning and packing for a multi-day trip can be a tricky business.
This is mainly because of the need to find a balance between keeping your pack light whilst also allowing yourself a few “luxury” items that will mitigate the absence of other home comforts.
In addition to our must-have items, some other things you might want to consider bringing include:
Note:
- Freeze-dried meals (I usually find this is the thing my body is most grateful for after 3/4 days of rice and/or stale sandwiches)
- A good book (paperback recommended!)
- Extra tent pegs (loss of at least a few is, in my experience, almost inevitable)
Optional Items
The following optional items could help to make your camping trip all the more convenient and comfortable and/or maybe necessary for certain locations.
While mainly best suited to car-camping, other, heavier items could merit their place in your pack.
If you happen to have calves of steel, your own personal Sherpa to carry your gear for you(!), or just aren’t too concerned with pack weight.
Safety
Note:
Sleeping
Note:
- Hammock (handy if your partner starts snoring or conditions are good enough to seep outside)
- Sleeping bag liner (helps extend the lifespan of your sleeping bag)
Heath and Hygiene
Kitchen
Note:
- Camping cooler (to keep your beer and grub fresh)
- Cotton balls soaked in petroleum jelly (they make great fire-starters)
Comfort and Convenience
Camping tips

A few simple insider tips can help to elevate your camping experience from one to forget into one to remember.
Below, I’ve listed the most important ones:
1. Test Your Gear Before You Go
Pitching your tent for the first time in a biblical downpour or hurricane-like winds is no fun (trust me, I’ve tried it!).
Before setting off on your trip, practice pitching your tent until you’re a dab hand and can do so in under five minutes.
Whenever I buy a new tent, I make a game of this by attempting to pitch my tent in record times!
With other gear items—sleeping pads, sleeping bags, stoves—be sure to check all is in working order to save yourself any nasty surprises when setting up camp.
2. Do Your Pre-Trip Research
Before setting off on your trip, it’s well worth doing a little digging to get the lay of the land, so to speak.
Get your hands on any guidebooks, maps, and read recent trip reports that might give you a better idea of the terrain, the availability of water, and find out about any trail closures or location-specific features (or problems) you might encounter.
3. Choose Your Pitch Carefully
Choosing the ideal camping pitch isn’t as simple as you might expect. IN addition to finding a flat, reasonably dry patch of land, your pitching point should:
- Make use of natural windbreaks like woods, boulders, knolls, or outcrops
- Be near a water source (but not too near one that might overflow!)
- Not be under a tree with any large branches that might fall during the night
- Not in exposed terrain or on a ridge if there’s a chance of thunderstorms
- Not in the run-out path of any slopes that might avalanche if winter camping
- At least 3 meters (15 feet) from your campfire (to avoid sparks reaching your tent)
- Exposed on the east side so as to receive the morning sun
4. Pitch First, Play Later
When we first arrive at our camping spot, many of us are apt to get a touch too excited or caught up in other chores like filling water bottles, cooking, collecting firewood, and taking pictures.
This is all very well if conditions are great, but if they take a turn for the worse we’re sure to regret our dithering in a hurry!
5. Optimize Your Tent Setup
Tents can be fairly uncomfortable places at the best of times, but a few minor ‘hacks’ can help you greatly increase their comfort levels. For example:
- Lay unused clothes on the tent floor to make a carpet that protects your knees and backside when moving around the tent
- Use your emergency bivvy bag/space blanket/tarp as foot mat in the porch to keep your feet dry when entering and exiting the tent
- Use rocks to pin down the base of your tent and prevent the material flapping in the wind
- Bring your gear inside the tent with you n cold nights—this improves thermal efficiency by leaving less space to warm up with your body heat
- Position your sleeping bag so your head will be uphill if camping on a slope—this helps prevent blood rushing to your head and causing headaches
Frequently Asked Questions

1. Should I wear approach shoes or hiking boots?
Both options are appropriate in different situations and in different terrain.
If car-camping, the chances are you can easily get away with a pair of trail shoes or sneakers as long as the campground isn’t too boggy and conditions are relatively dry.
If, however, you plan on putting in any sort of mileage on trails before reaching your campground, we’d highly recommend opting for a pair of sturdier trekking boots.
Not only will these help to ensure your feet stay dry on the boggier ground but also offer more protection in rougher terrain and provide better support for your ankles if carrying a heavy pack.
2. What size of backpack do I need?
This will ultimately depend on a few variables and your responses to the following questions:
- Are you an ultralight camper or everything-but-the-kitchen sink kinda camper?
- Are you camping for just one or two nights or on a multi-day trip?
- Are you camping in warmer conditions where you can get away with lighter gear or in colder conditions in which you’ll need extra layers and heavier, winter gear?
While these variables will affect the size of pack you need, the following figures represent a ballpark guide for varying trip durations:
- 1-2 nights: 20-40 liters
- 2-3 nights: 40-60 liters
- 3-5 nights: 60-80 liters
- 5+ nights: 80-100 liters
3. What size of tent do I need?
Most tents come with a person-rating or max capacity designed to give you an idea of how many occupants the tent can accommodate.
The marketing people at most tent manufacturers, however, tend to be a touch on the optimistic side when assigning these ratings and a so-called “two-person” tent may be a touch “cozy” for two adults.
This being so, we’d highly recommend paying closer attention to the capacity of any tent in cubic feet, which is the most useful metric—in tandem with peak height—by which we can gauge a tent’s overall livability.
Most tent brands simply provide measurements of length and width in feet (i.e 6’x8’).
But by multiplying these numbers we can calculate the floor area’s total square footage (I.e. 6’ x 8’ = 48’) and use 15/16 square feet as a rough figure of the ideal space required for one adult sleeper.
4. What are some examples of items you DON’T need?
Over the years, I’ve seen a wealth of weird and wonderful items coming out of fellow campers backpacks—hairdryers, teddy bears, laptops, six-packs of beer, a banjo, guitars, electric fans, a Scrabble board, fondue kits, and at least six copies of Harry Potter.
While I’d be loath to deprive anyone of their creature comforts, here’s a short list of some commonly carried items that, in most cases, you could easily do without:
- Pillows (use a jumper or jacket)
- Trail stool (use a rock, your backpack, or simply sit on the floor)
- Milk (it’s heavy and goes off in a hurry—bring dried milk instead if necessary)
- Musical instruments (the sounds of nature are far more captivating)
- iPad/Tablet/Laptop (being in the wild is one of those rare times when we are free of the screens that dominate the rest of our lives—make the most of it and leave them at home)
- Firewood (stoves are more environmentally friendly and weight- and fuel-efficient)
- Camp shoes (going barefoot or using your trail shoes/boots is not going to kill you!)
- Huge flashlights (headlamps are smaller, lighter, and require fewer/smaller batteries)
- Umbrellas (no comment!)
- Tupperware (zip-lock polythene bags are lighter and more packable)
- Detergent and deodorant (indulge your natural musk!)
My advice? If you can live without it, leave without it!
5. What further safety precautions can I take?
Due to the nature of the terrain in which most of us are likely to be doing our camping, there are a number of ways in which things can go wrong that simply don’t exist in our daily lives in the town or city.
And out in the wild, moreover, the means or rectifying situations or acquiring help are, naturally, not so readily available, and in many remote areas no cell reception and it may be a matter of hours or days before we can get to safety or find assistance.
This being so, before heading on any trip you should be prepared to be self-sufficient but also take the necessary measures to ensure to maximize your chances of rescue if things go seriously south.
The best policy is to always leave a detailed route description with someone back home before setting off.
This should include a list of places you expect to make camp and an estimated return time.
You should also establish a time at which your contact will, if they haven’t heard from you, notify the authorities.
Conclusion
Heading into the backcountry for a few nights of camping can be a daunting experience for newcomers and old hands alike.
Getting your pre-trip camping checklist right is of the utmost importance.
And now I’d like to hear from you:
Are there any aspects of this article you found particularly useful?
Did I miss anything out?
Either way, let me know by leaving a comment in the box below.
Happy camping!
Leave a Reply